

Explore the essentials of setting up Flavours in Flutter for streamlined development and deployment.


Flutter, Google's open-source UI toolkit, empowers developers to create natively compiled applications for mobile, web, and desktop from a single codebase. One of its powerful features, Flutter flavors, facilitates the creation of multiple versions of an app with distinct configurations, branding, and functionality for different environments or purposes. This versatile tool streamlines the process of building separate variations of an app, tailored specifically for various platforms, such as Android and iOS. 📱
Understanding Flutter Flavors
Flutter flavors are a mechanism that allows developers to manage multiple configurations within a single codebase. These configurations, known as "flavors," enable the creation of distinct versions of an app, each catering to specific environments or requirements. This flexibility proves invaluable when an app needs to have different behaviours, assets, or configurations across various deployment environments, like development, staging, or production.
Leveraging Flavors for Platform-Specific Customization
One of the key advantages of Flutter flavors is the ability to customize an app's behaviour for specific platforms. For instance, developers can utilize platform-specific code to integrate platform-specific features or adapt the app's appearance to match each platform's design guidelines. This customization ensures a seamless and native-like experience for users on both Android and iOS devices.
Managing Environments with Flavors
Flutter flavors excel in managing different environments, such as development, staging, and production. Developers can set up configurations that automatically switch between different backend endpoints, analytics settings, or debugging tools based on the flavor being built. This simplifies the process of managing different deployment environments while maintaining a single codebase.
Simplifying Branding and Theming
Flavors also play a crucial role in branding and theming. With Flutter flavors, developers can easily create different branded versions of an app by tweaking assets, colors, and other design elements. This capability proves immensely beneficial when creating white-labelled apps or versions targeting specific audiences while sharing the same core functionalities.
1. Setting Up Flutter Flavors
To implement flavors in a Flutter project, developers define different configurations and dependencies for each flavor in the project's configuration files. For instance, for Android, this involves creating separate directories for each flavor (main, flavor1, flavor2, etc.), each with its own set of resources, such as icons, strings, or even platform-specific code. Similarly, for iOS, developers configure different schemes and build configurations to handle distinct flavor-specific settings.
In this section, we will understand what steps we need to follow in Android, iOS and Flutter to make the Flutter flavor works as we desire.
Setting up Flavors in iOS:
Step 1: Open iOS in xCode.
Step 2: Goto manage Schemes
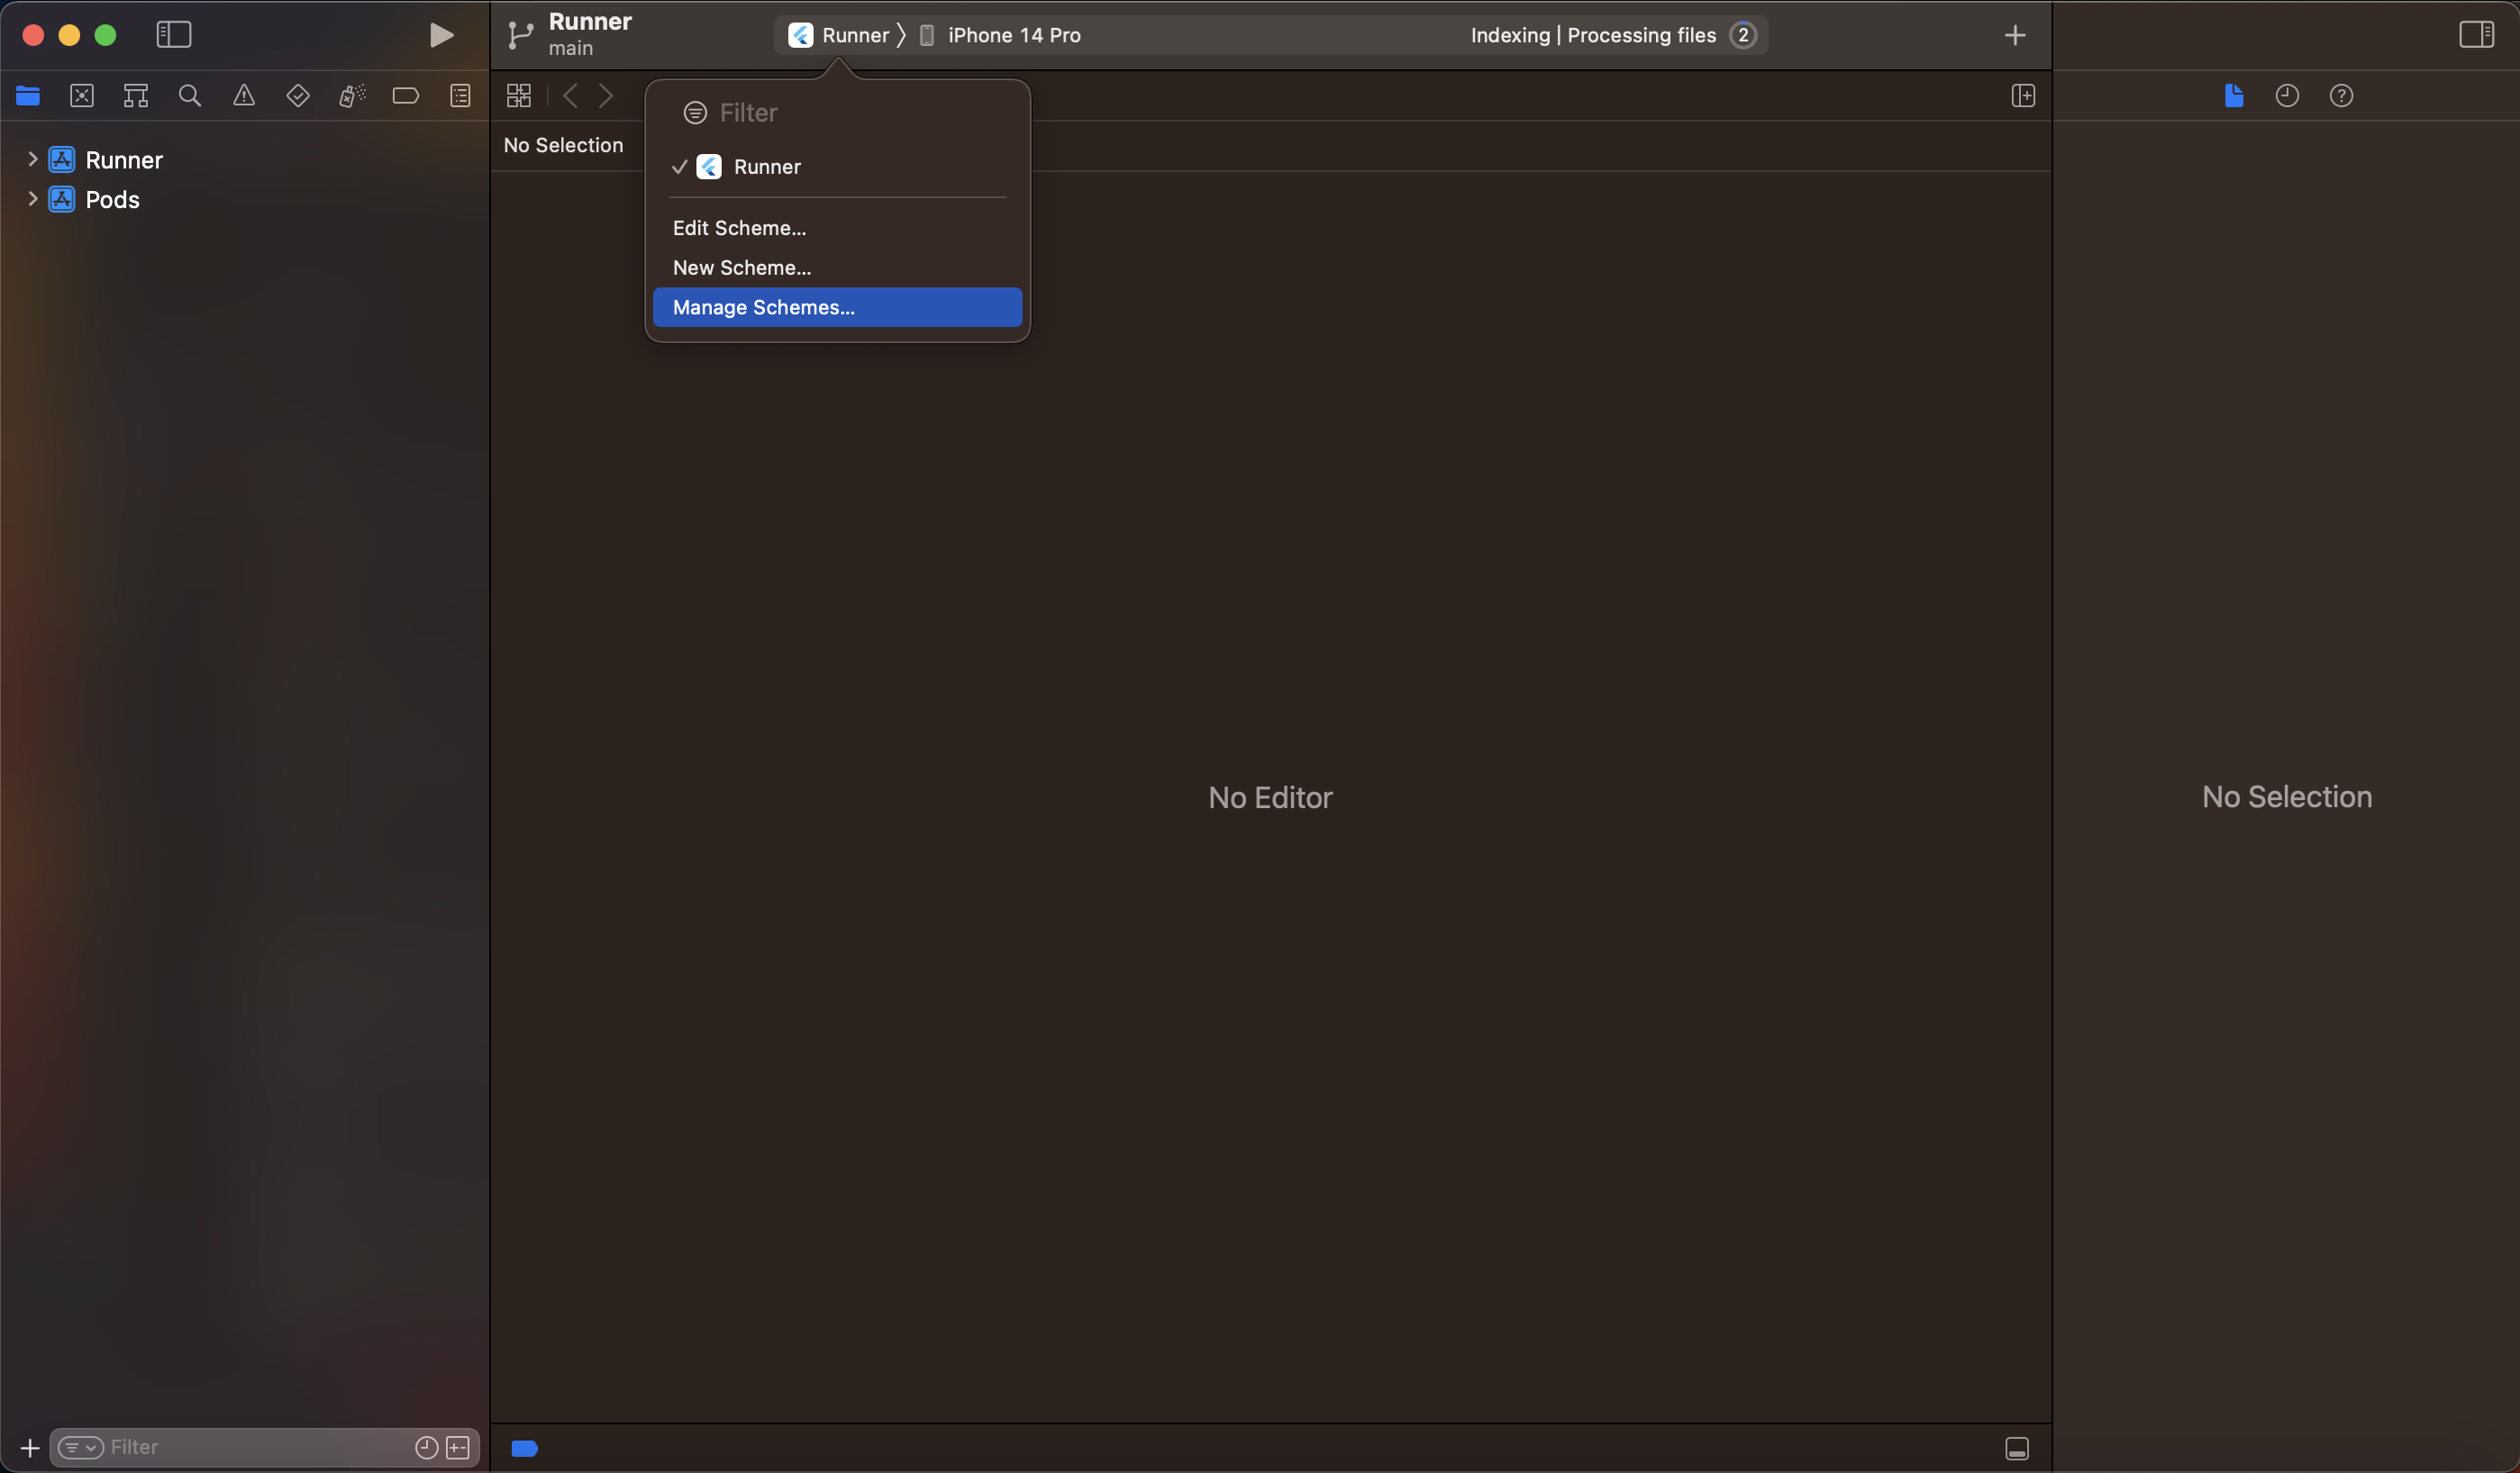
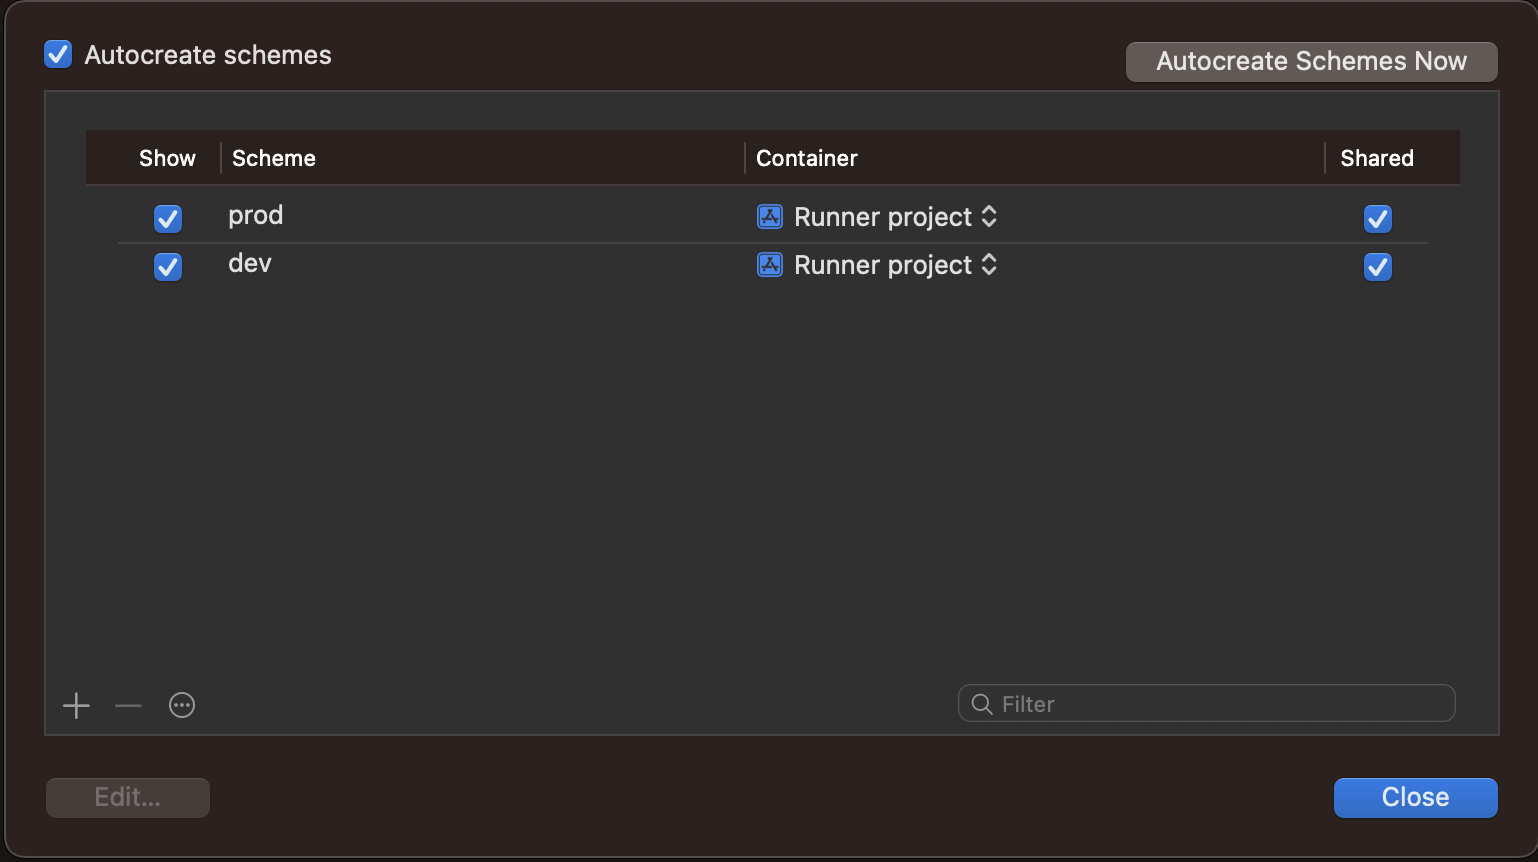
Step 3: Rename the existing Schema to prod and create a new schema called dev by clicking the "+" button on the bottom left corner.
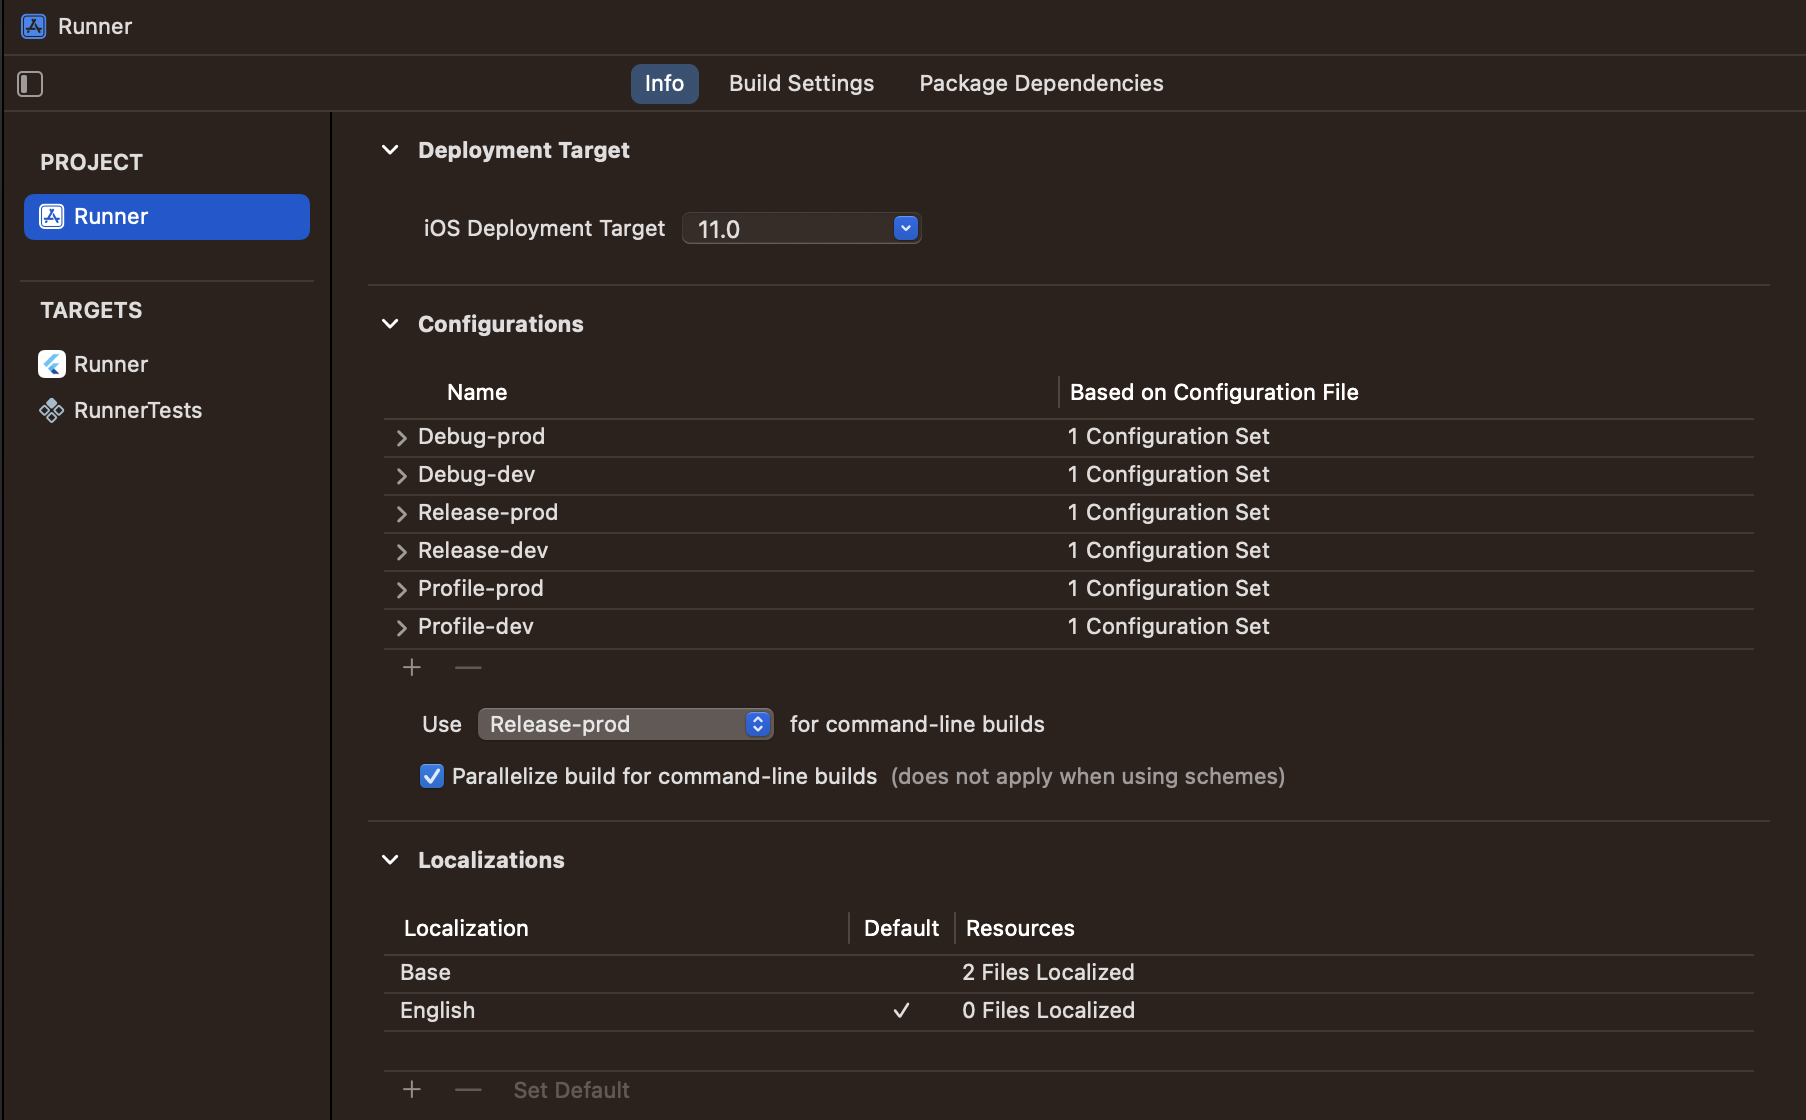
Step 4: Goto info section of Project Runner and add duplicates on Debug, Release & Profile configurations by clicking the "+" button on the bottom left corner.

Step 5: Rename one set on Debug, Release & Profile configurations as prod and the other as dev.
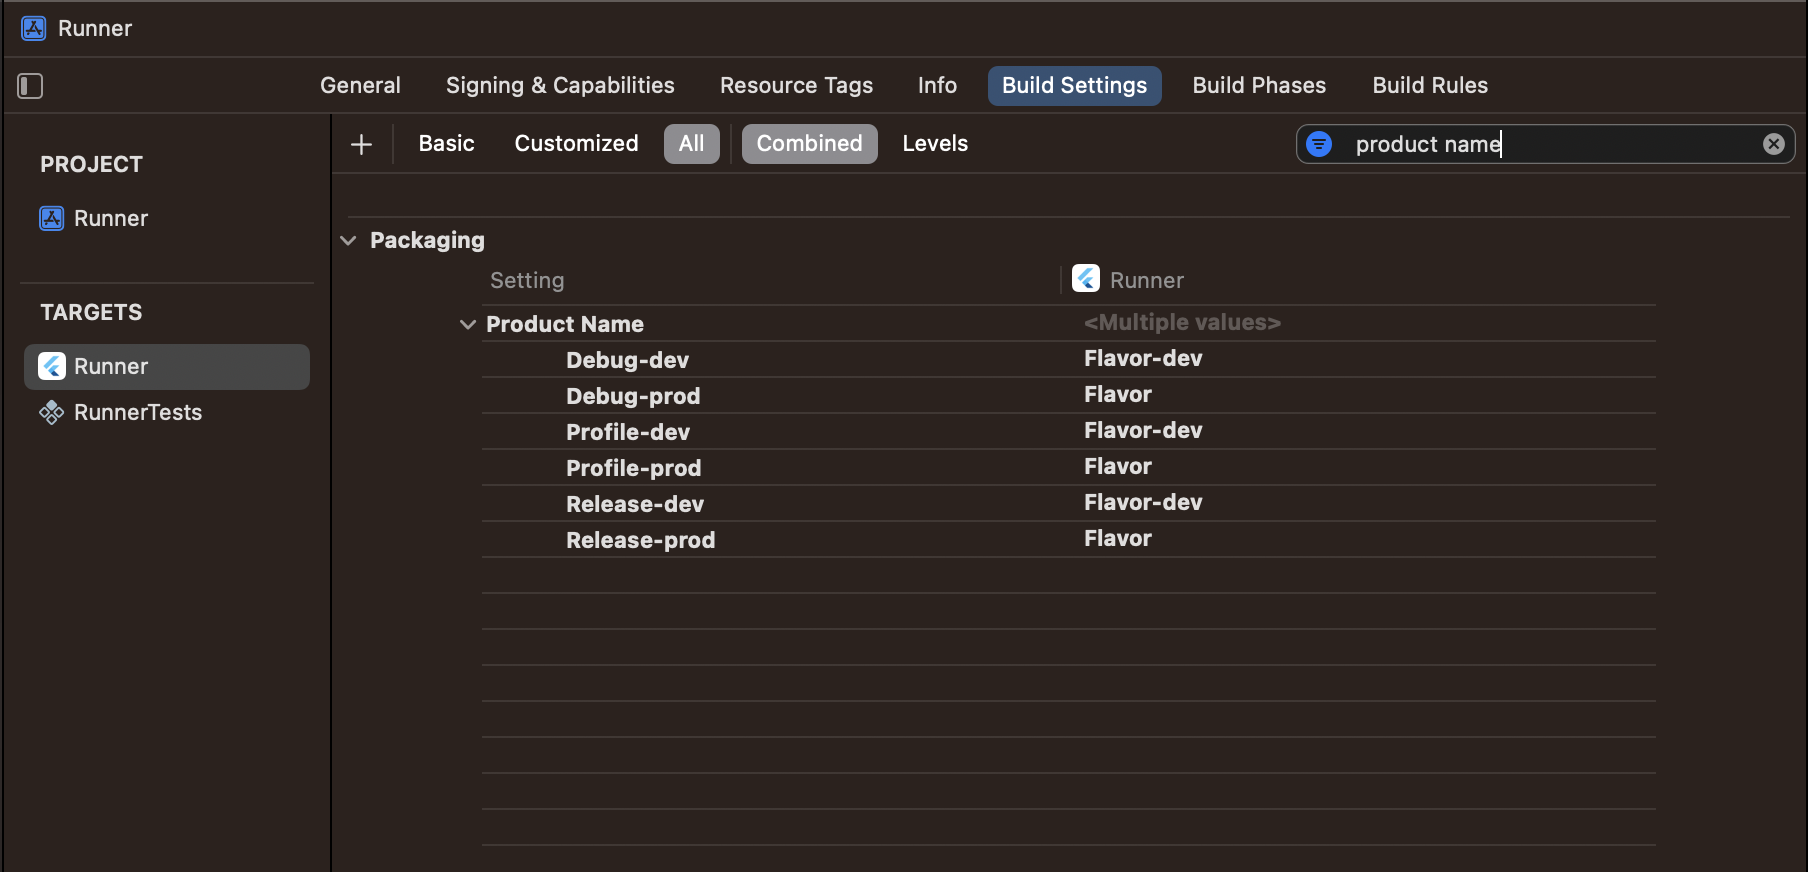
Step 6: Go to the Build Settings section of Target Runner and search for Product Name.
Step 7: Add a different name for the dev and prod app.
Step 8: Now search for "product bundle identifier" and the bundle ID of dev and prod configurations as you want.

Step 9: Open info.plist file and change "Bundle display name" to "$(PRODUCT_NAME)".
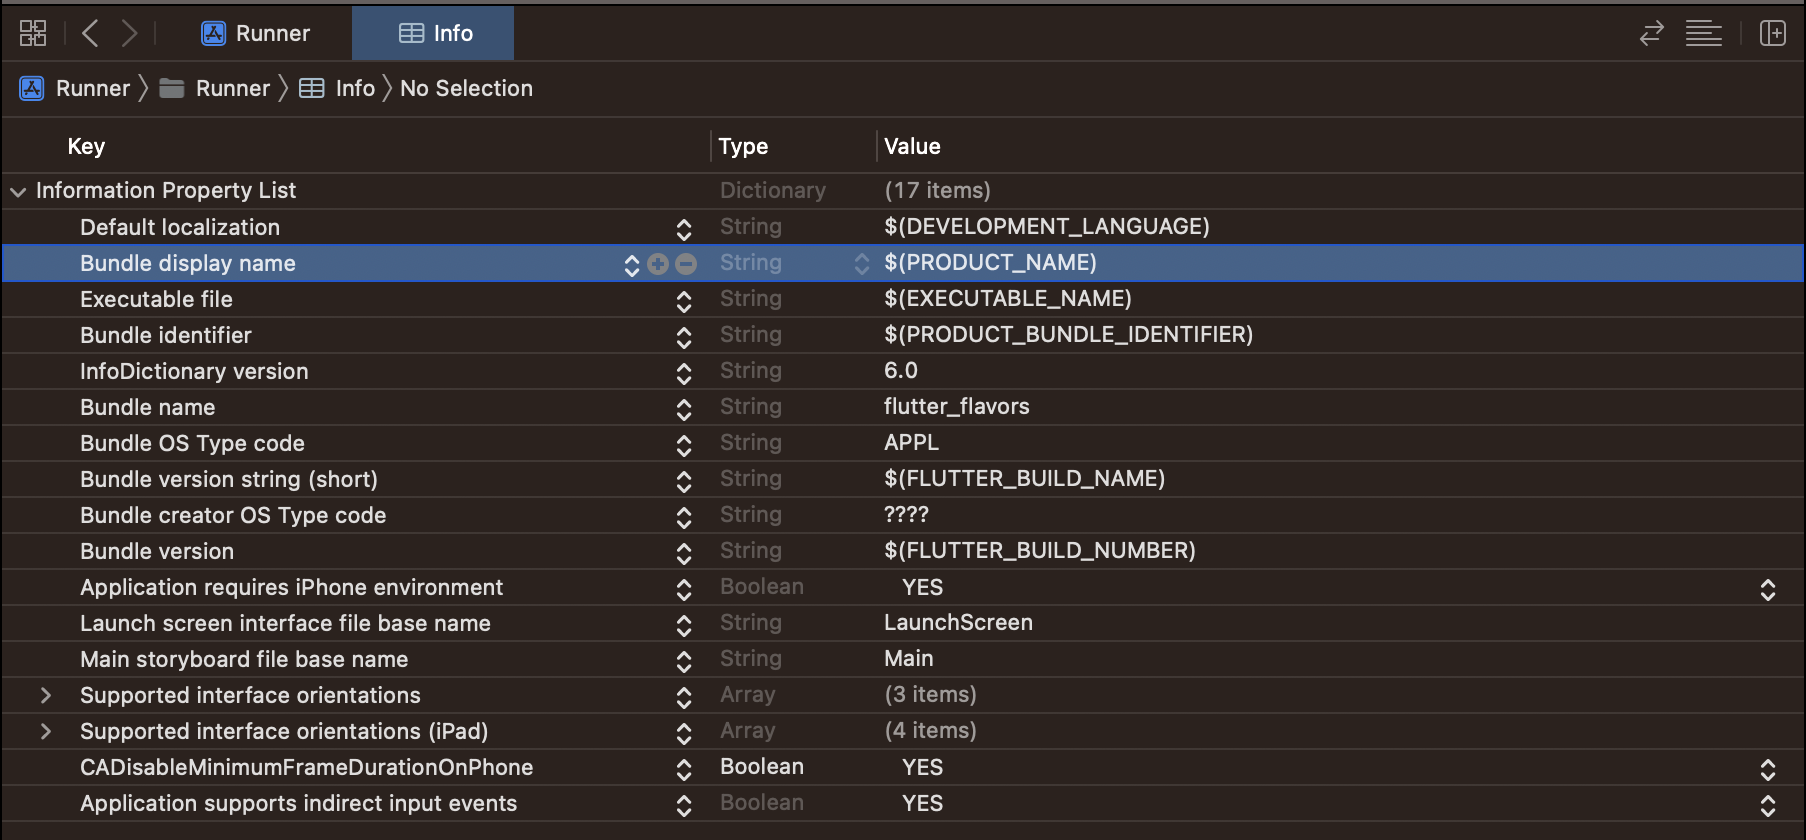
We are done with the iOS steps.
Setting up Flavors in Android:
Step 1: Open build.gradle file and add the below code inside the Android section.
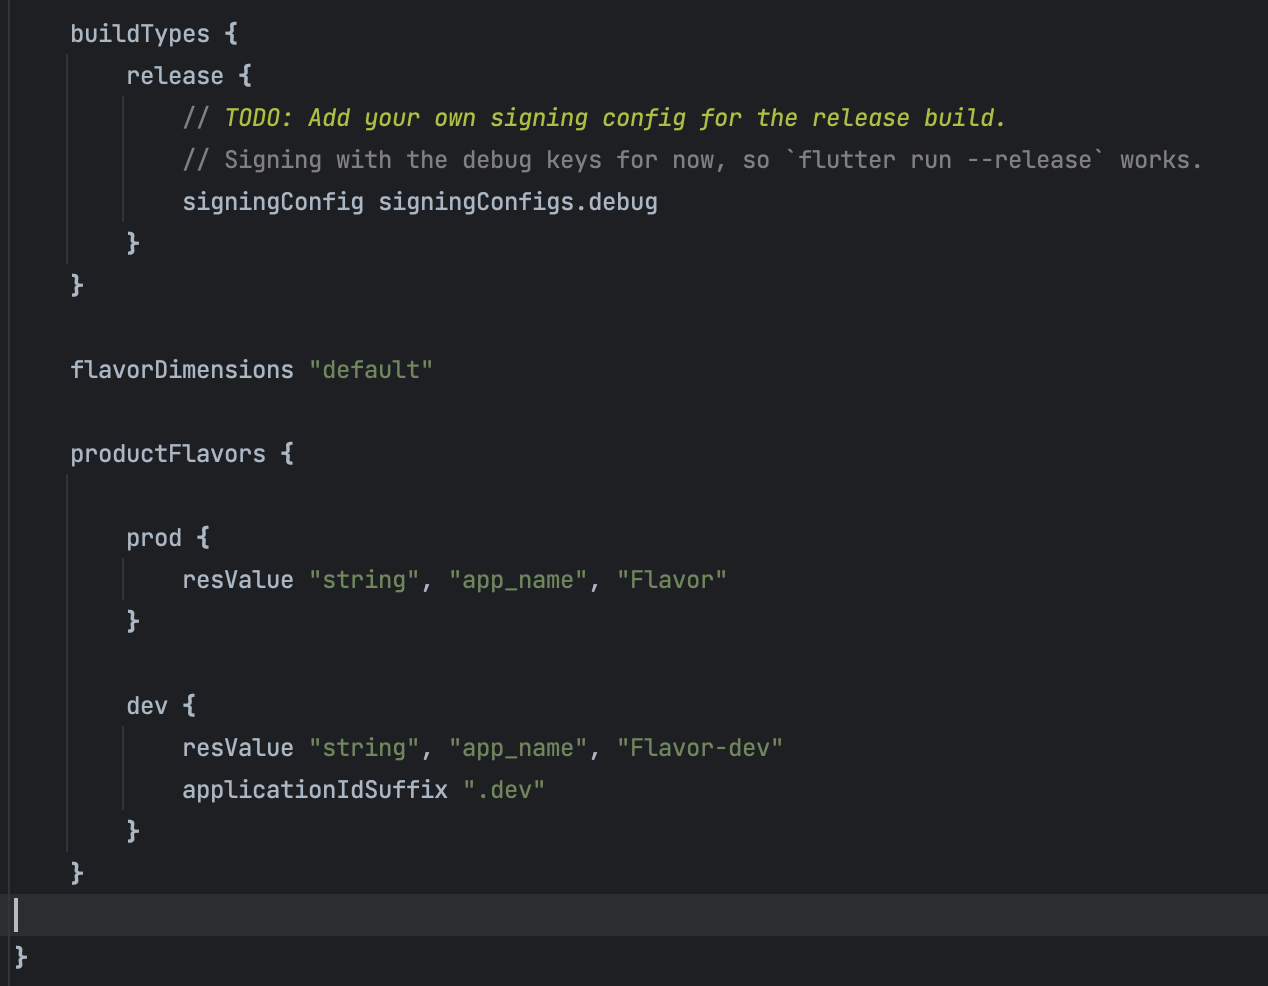
Step 2: Open AndroidManifest.xml file and "android:label" value to "@string/app_name".

With this, we are done with Android Steps. Now the final steps are related to flutter setup.
Final setup in Flutter:
Now to do the setup in Flutter we need to create two different main.dart files (or multiple main.dart files based on our requirements). One of the main files in our example will be for DEV and the other will be for PROD.

the setup for both the files will be as follows
main_dev.dart
main_prod.dart
Now after we are done with the code setup for both Android and iOS we need to configure our IDE to run our application on different environments.
2. IDE Configuration:
We need to add flavor configuration in our IDEs so that we can run our desired flavor from our desired IDE.
Configuration in Android Studio:
Once you create two main files your main file configuration on top of Android Studio IDE will be disabled. You have to reconfigure it according to your flavor set up so, that you can run your app.

Given below are the steps to reconfigure your Android Studio IDE:
Step 1: Go to edit configuration by clicking the drop-down arrow on the configuration panel.

Step 2: Click on the plus (+) icon in the top left corner of the configuration dialog box to add new configurations and then select Flutter.
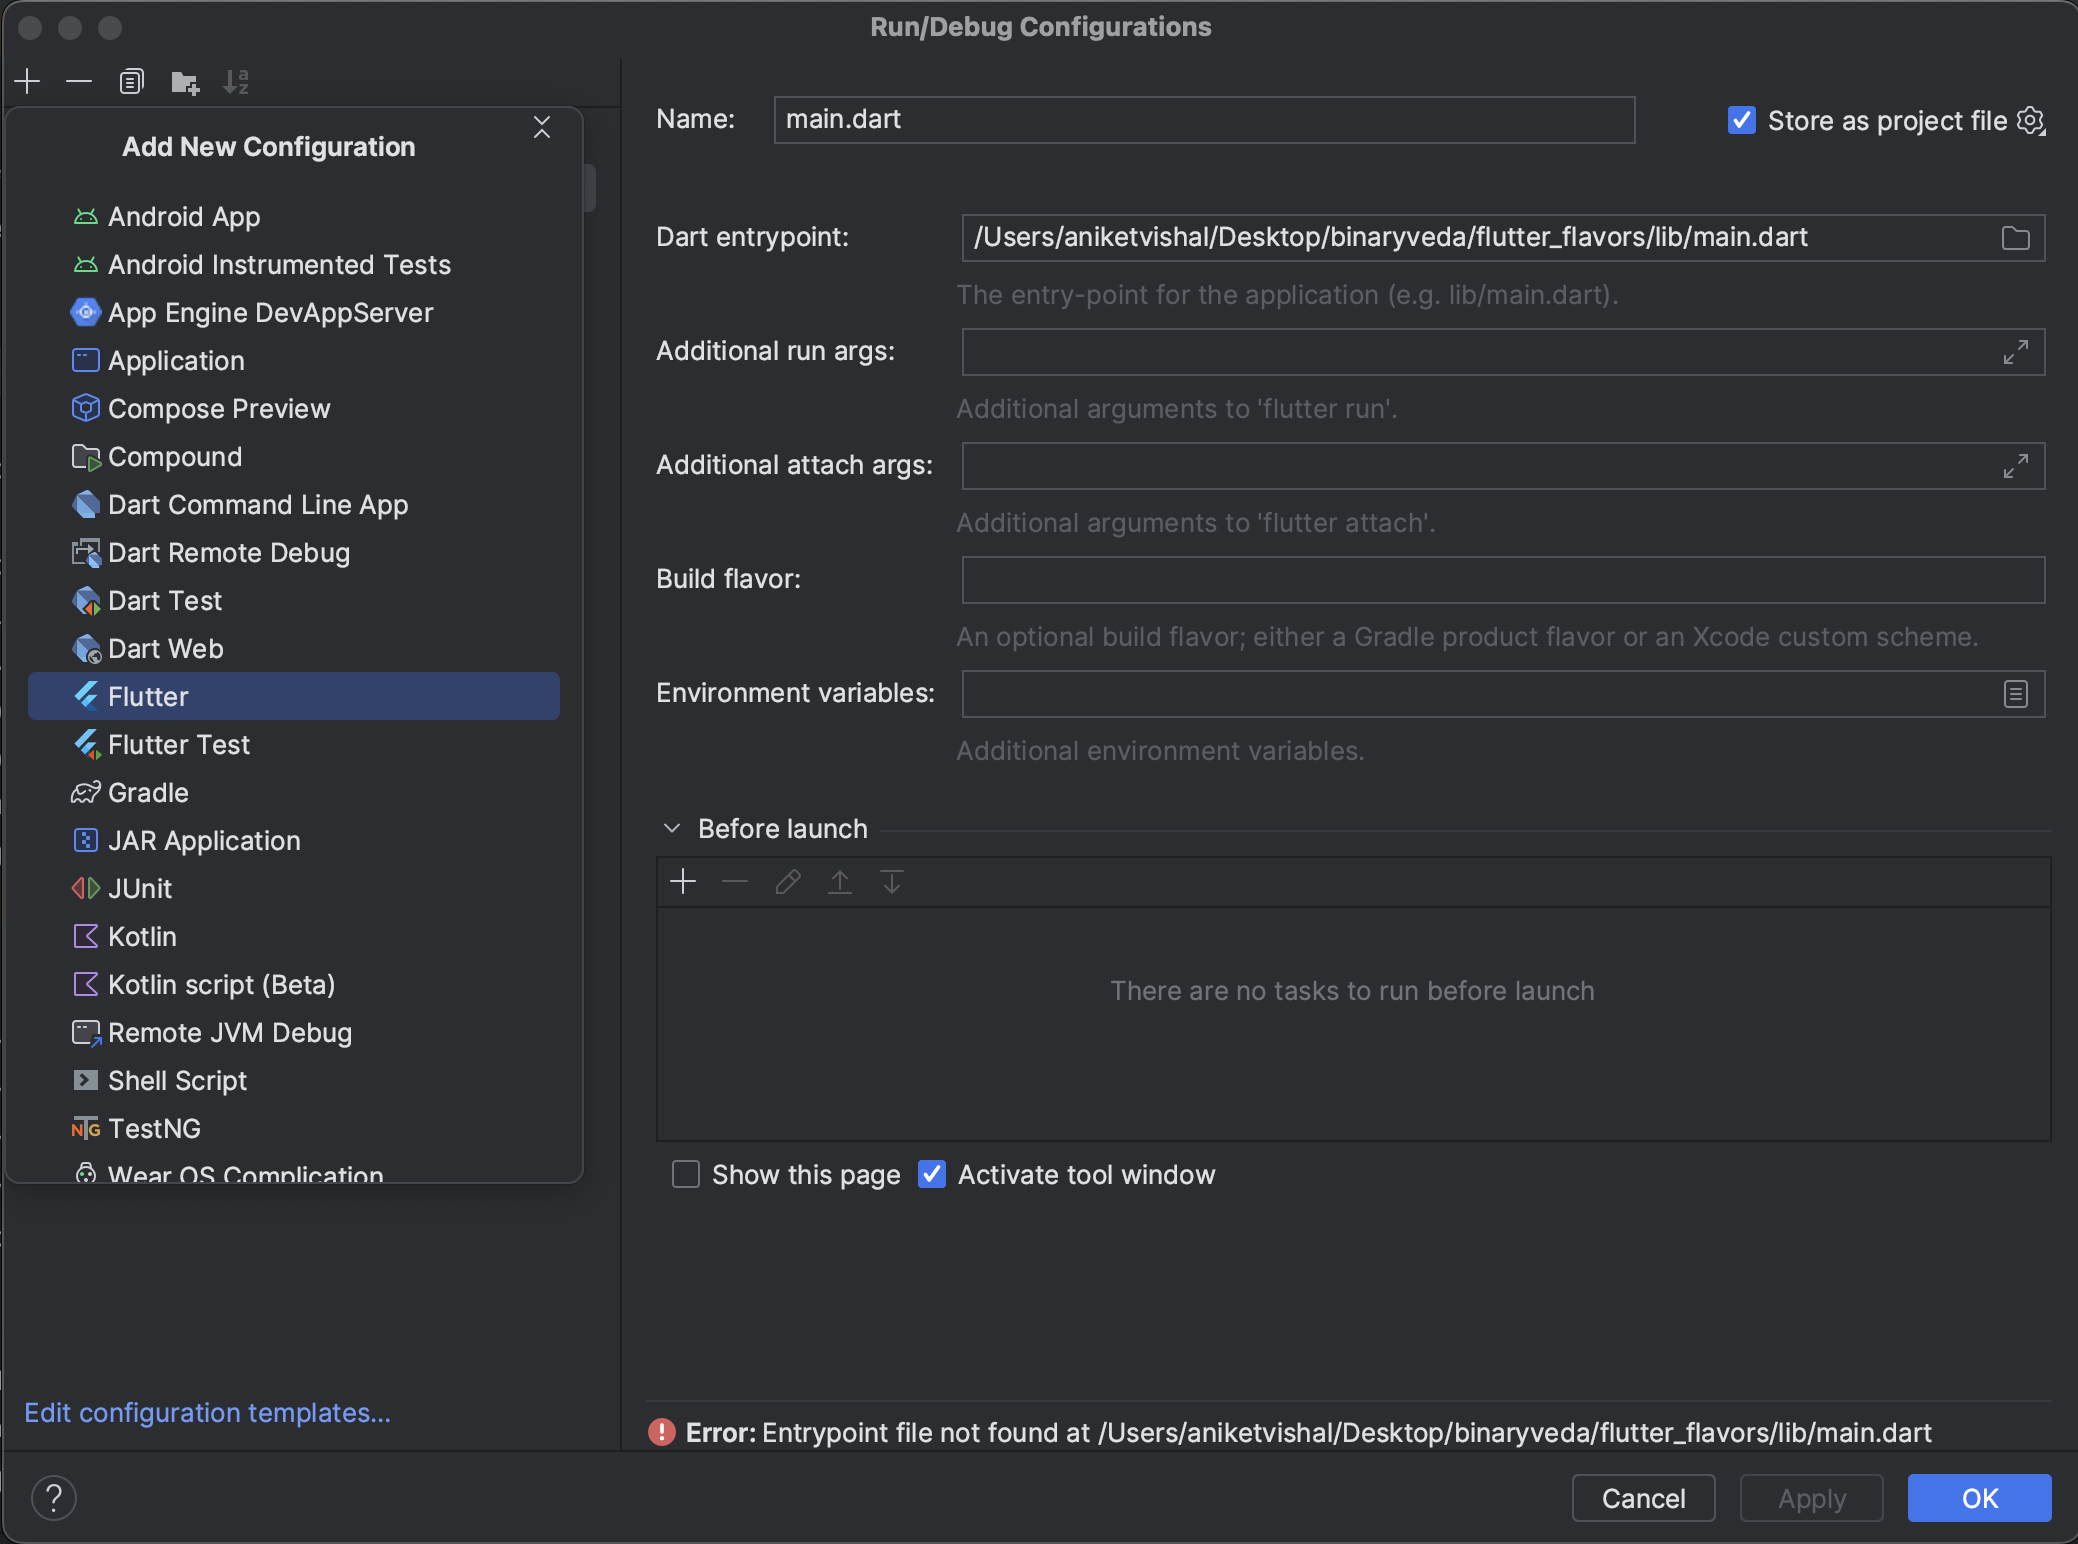
Step 3: Now we need to add three details for creating the configuration i.e. Name, Dart entry point & Additional run args.|
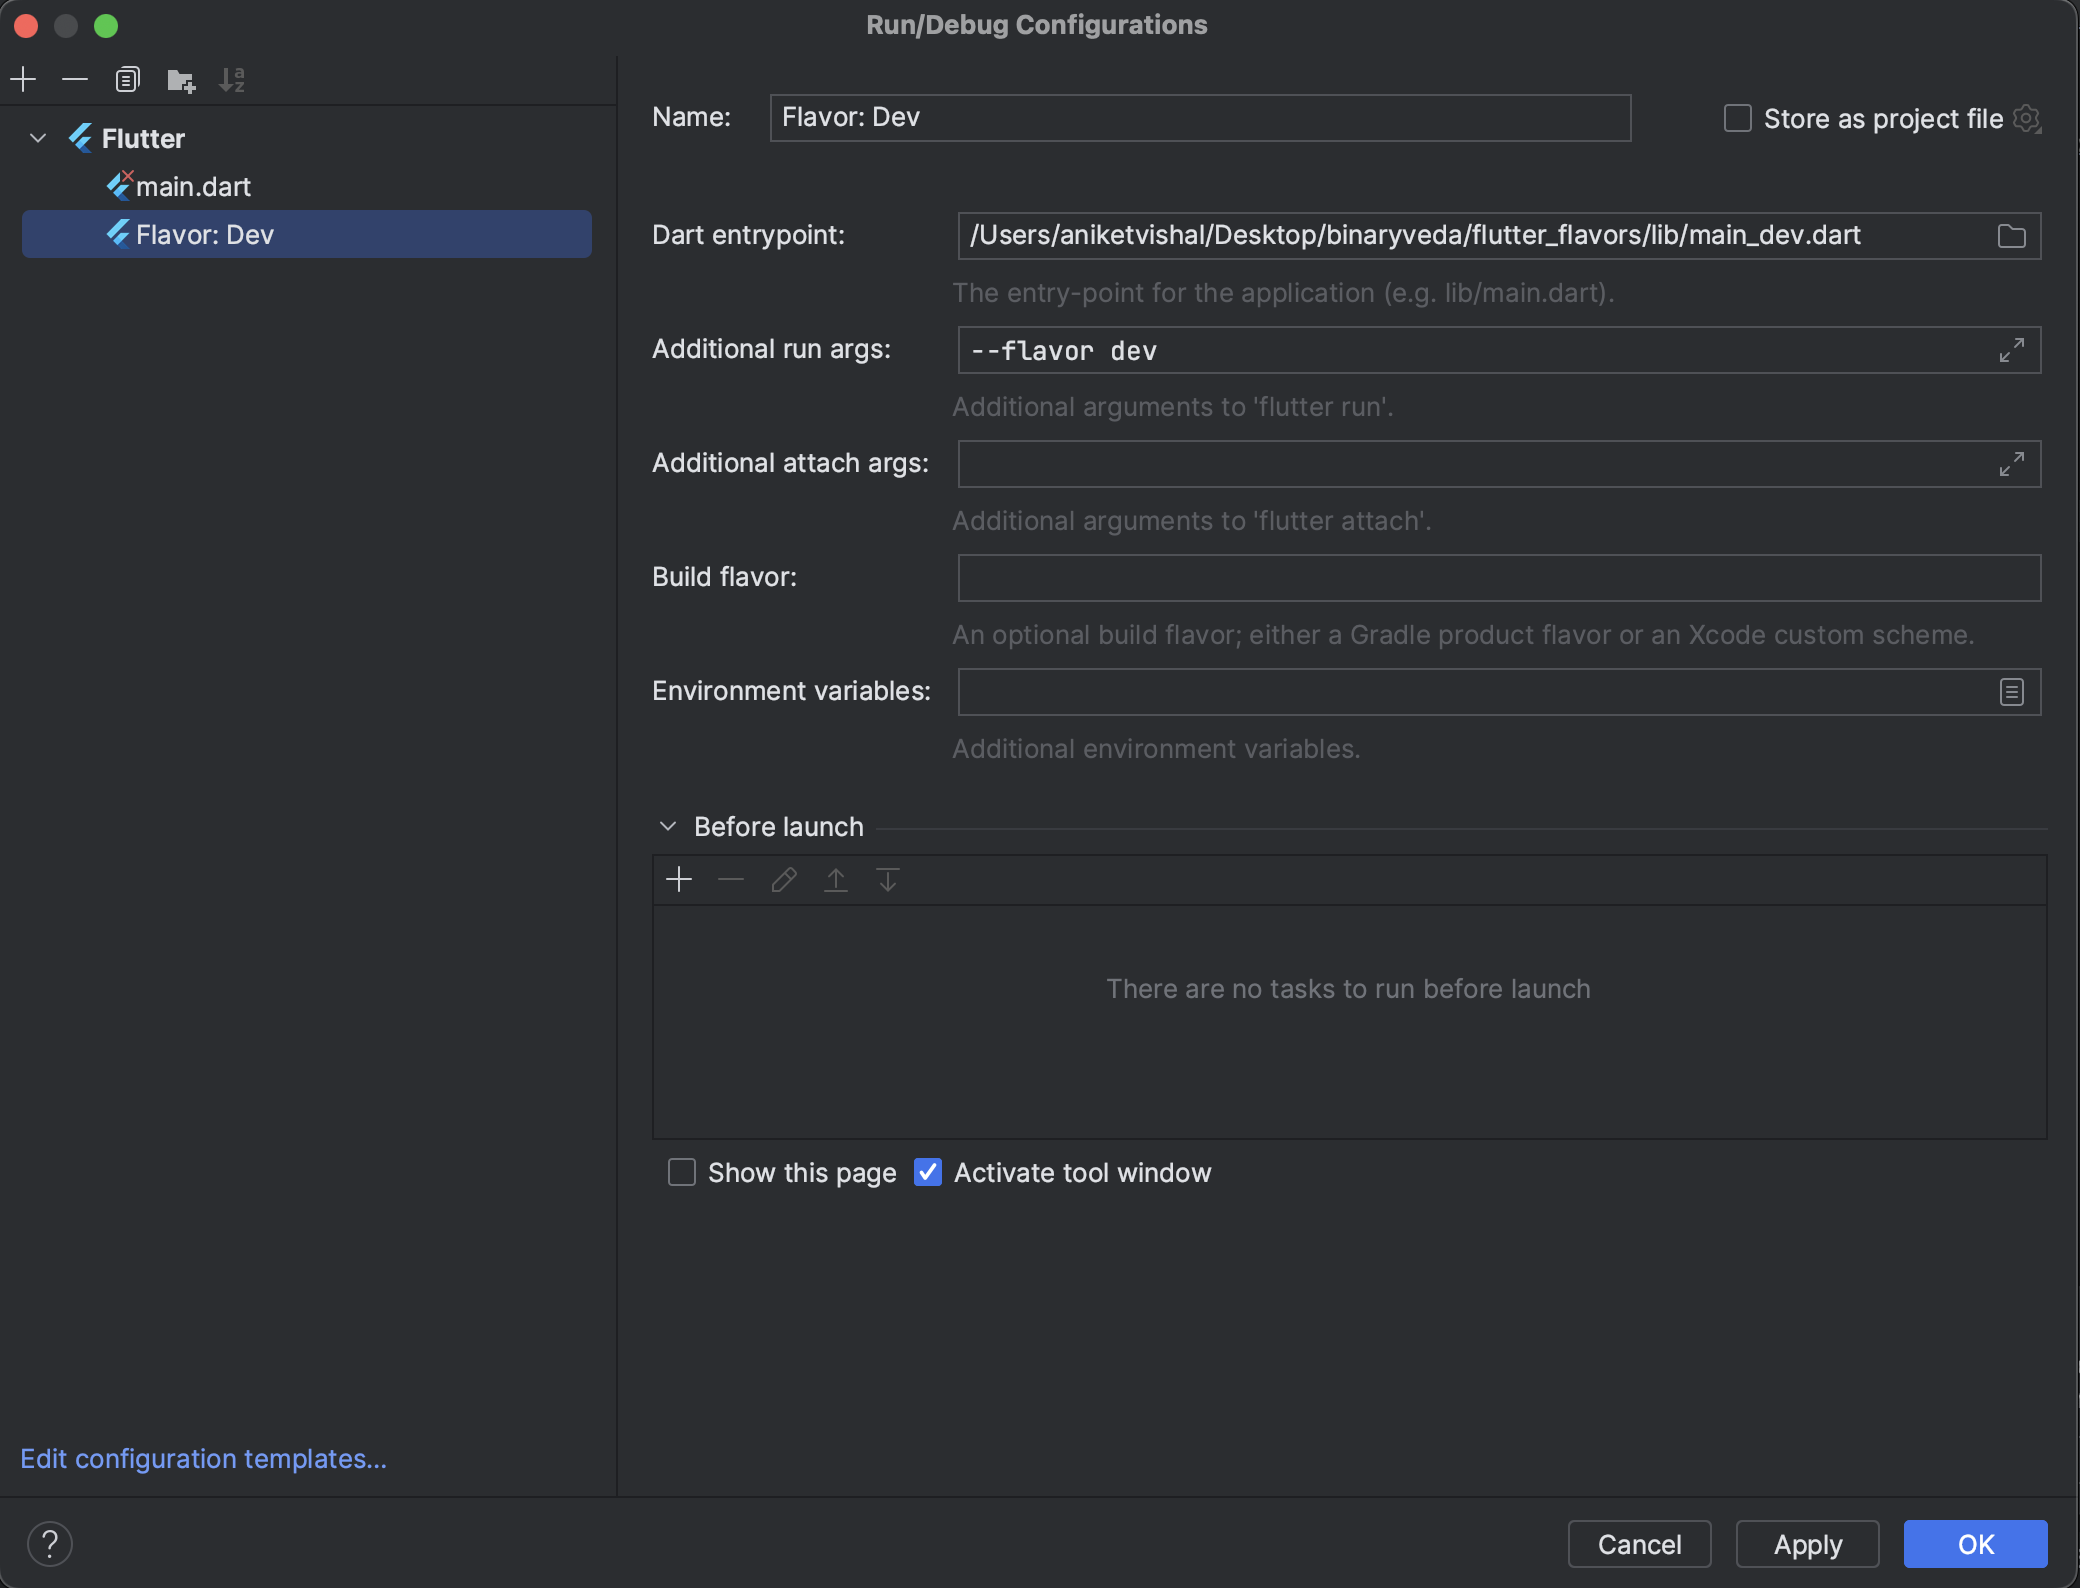
- The name can be anything in this case we will first create the dev configuration so I will name it Flavor: Dev.
- The Dart entry point should point to the main files that we have created for dev and prod. In this case, as we are creating the dev configuration first so, I will point it to the dev main files.
- Additional run args help us in running the desired flavor from the terminal and it has a fixed syntax i.e. --flavor <flavor name>. In this case, it will be --flavor dev as if we are creating the dev configuration first.
Step 4: Create a prod configuration similar to the dev configuration that we have discussed above.

Step 5: Once both the configurations were created click on Apply & OK to close the configuration dialog box. Additionally, if you want you can also delete the main.dart configuration.
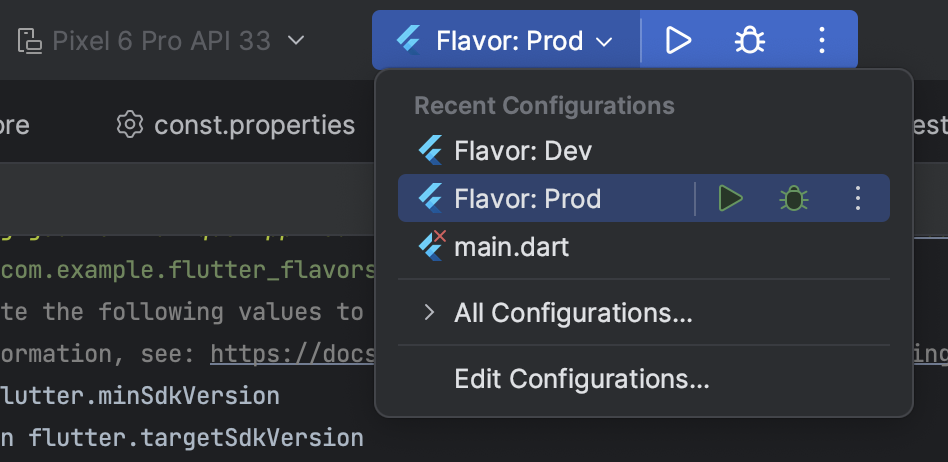
Now for the configuration panel drop-down menu, you can choose the configuration you want to run. With this, the Android Studio configuration is done.
Configuration in Visual Studio Code:
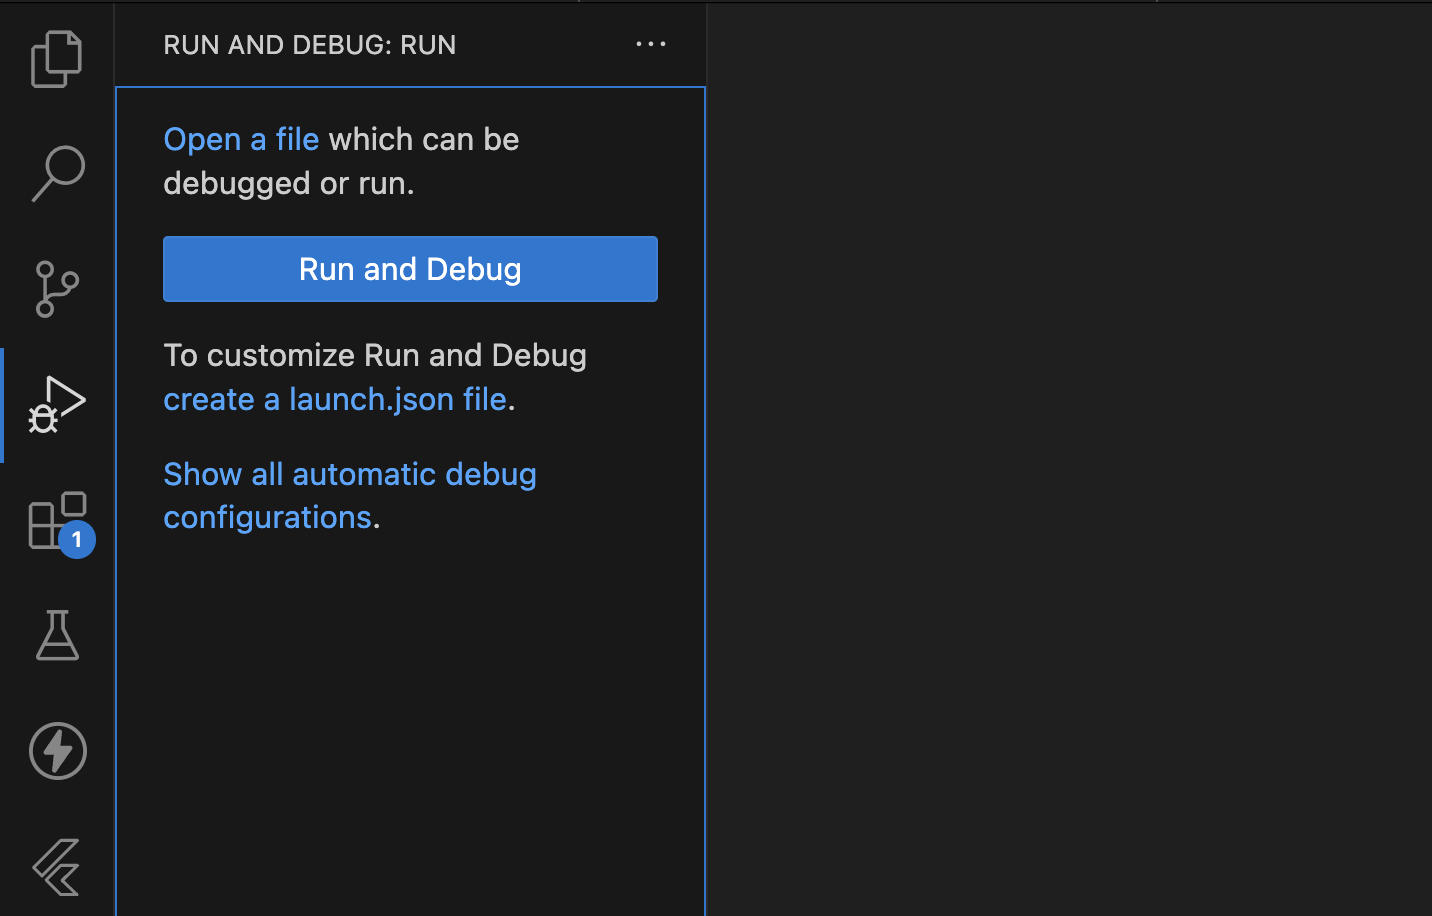
Step 1: One your project in VS Code and go to the Run and Debug tab from the sidebar. If you have two different main files for different flavors then in this tab you will get the option to customize Run and Debug.
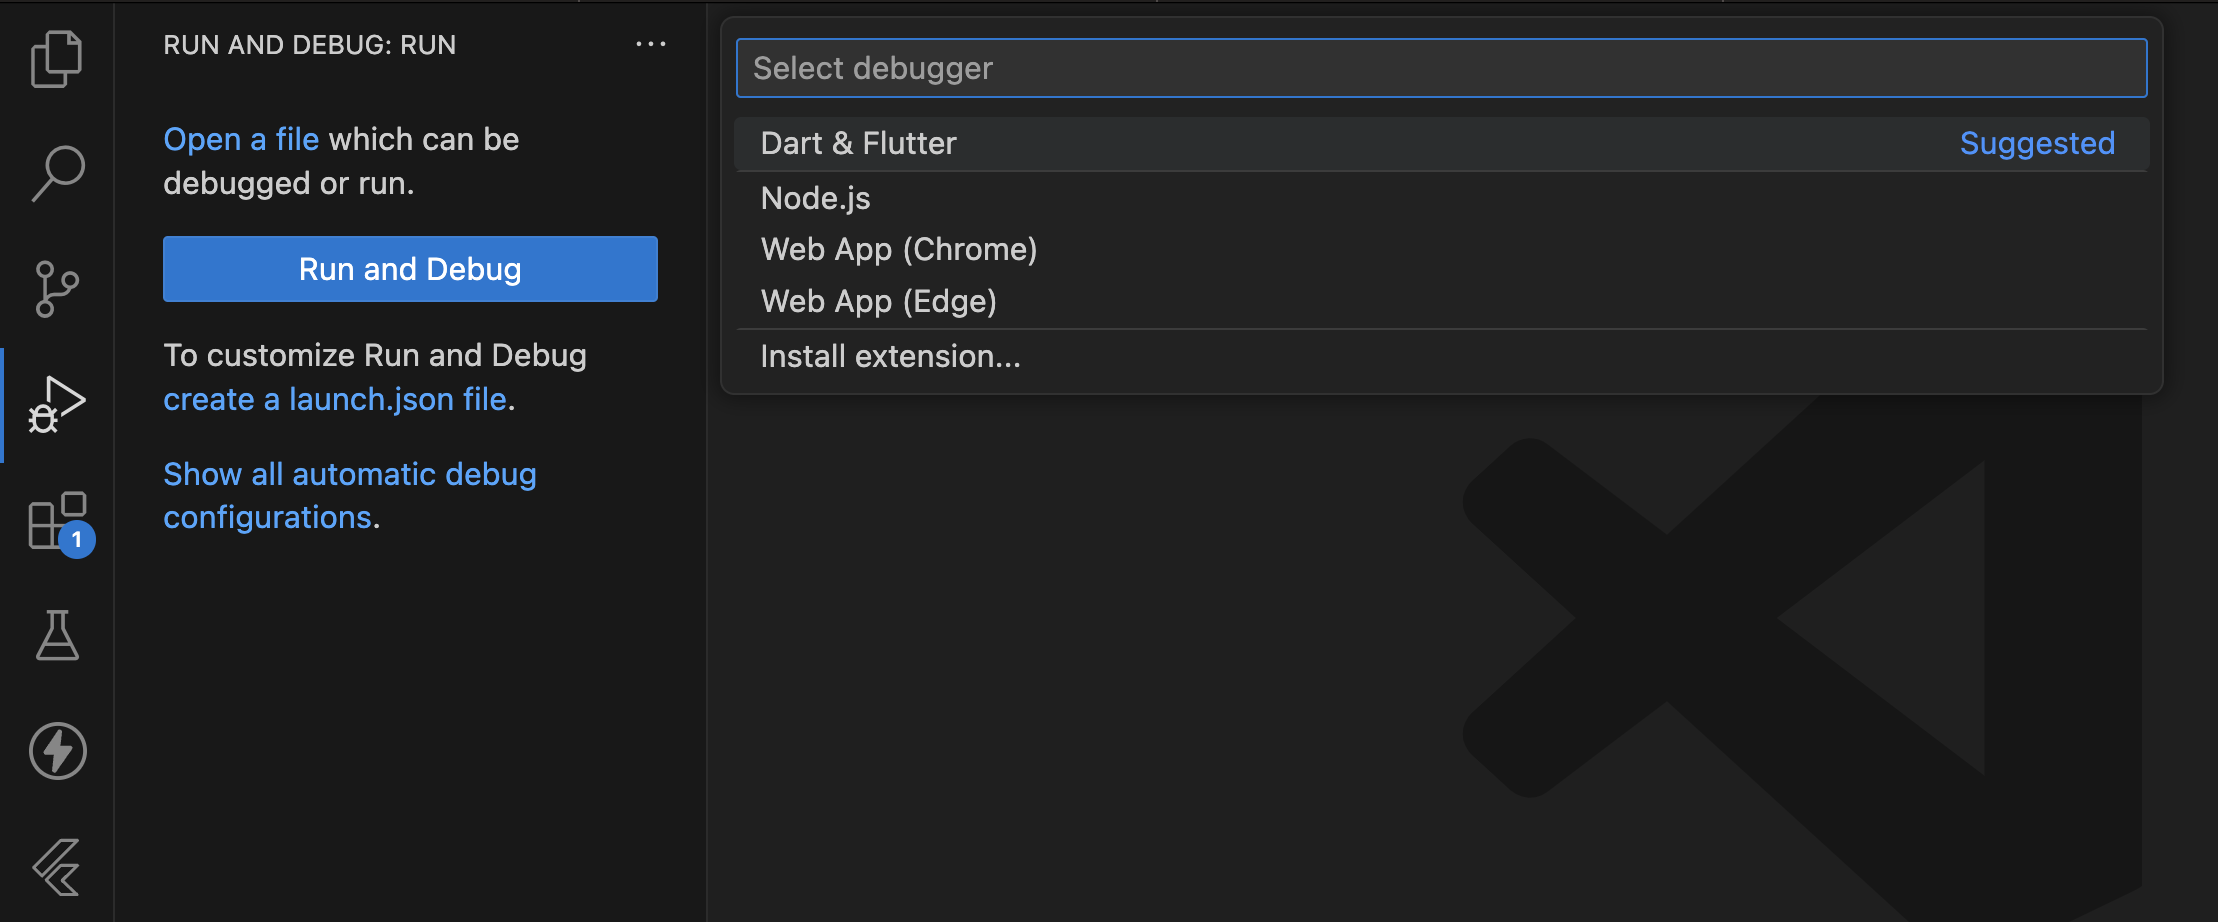
Step 2: Click on Create a launch.json file link and then select Dart & Flutter. This will create the launch.json file inside the .vscode folder in the root directory of the project.
Step 3: Replace the launch.json default code with the below code.
Now you can run the application with the desired flavor either from the Run and Debug tab or by directly going into the main file of the respective flavor.
3. Keys & CI/CD
Different keys for different flavor is one of the most important use cases of flavors. Suppose you have a auth key of some service and the key is different for dev and prod. Now you want to use the dev key while running the app in the dev flavor and the prod key while running it in the prod flavor. So, in this section, we are going to understand how we can achieve this scenario. Also while dealing with Keys we need to keep them secure so, we will discuss the security in the next section.
iOS:
The iOS setup can be done in 3 steps:
- Create two config files (one for dev and the other for prod) and add all your keys to this file. Also, include Flutter generated config file in it.
- Set these files in the runner configuration section to their respective scheme.
- Now you can use the declared keys in the info.plist.
Step 1: How to create the config file.
- Right-click on the flutter directory and click on the new file
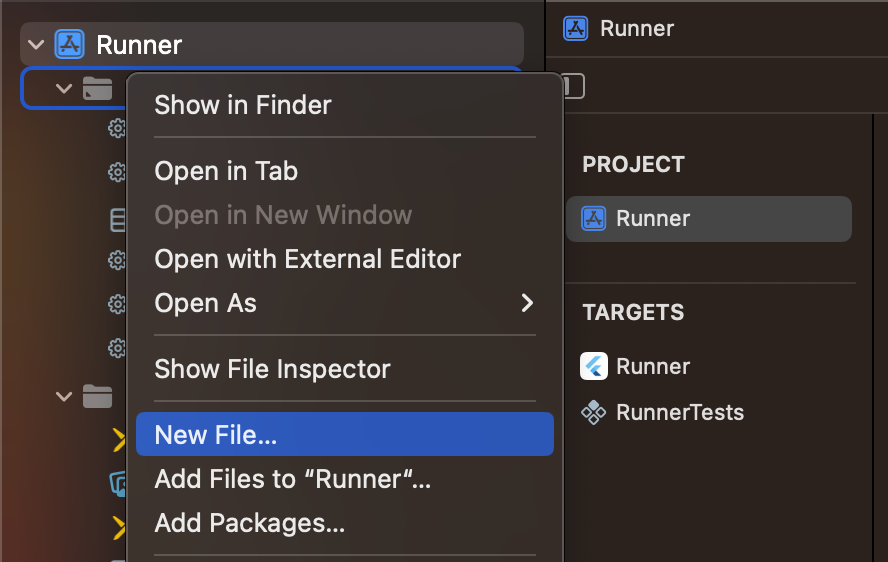
- Search for configuration and select "Configuration Settings File" then click on next.
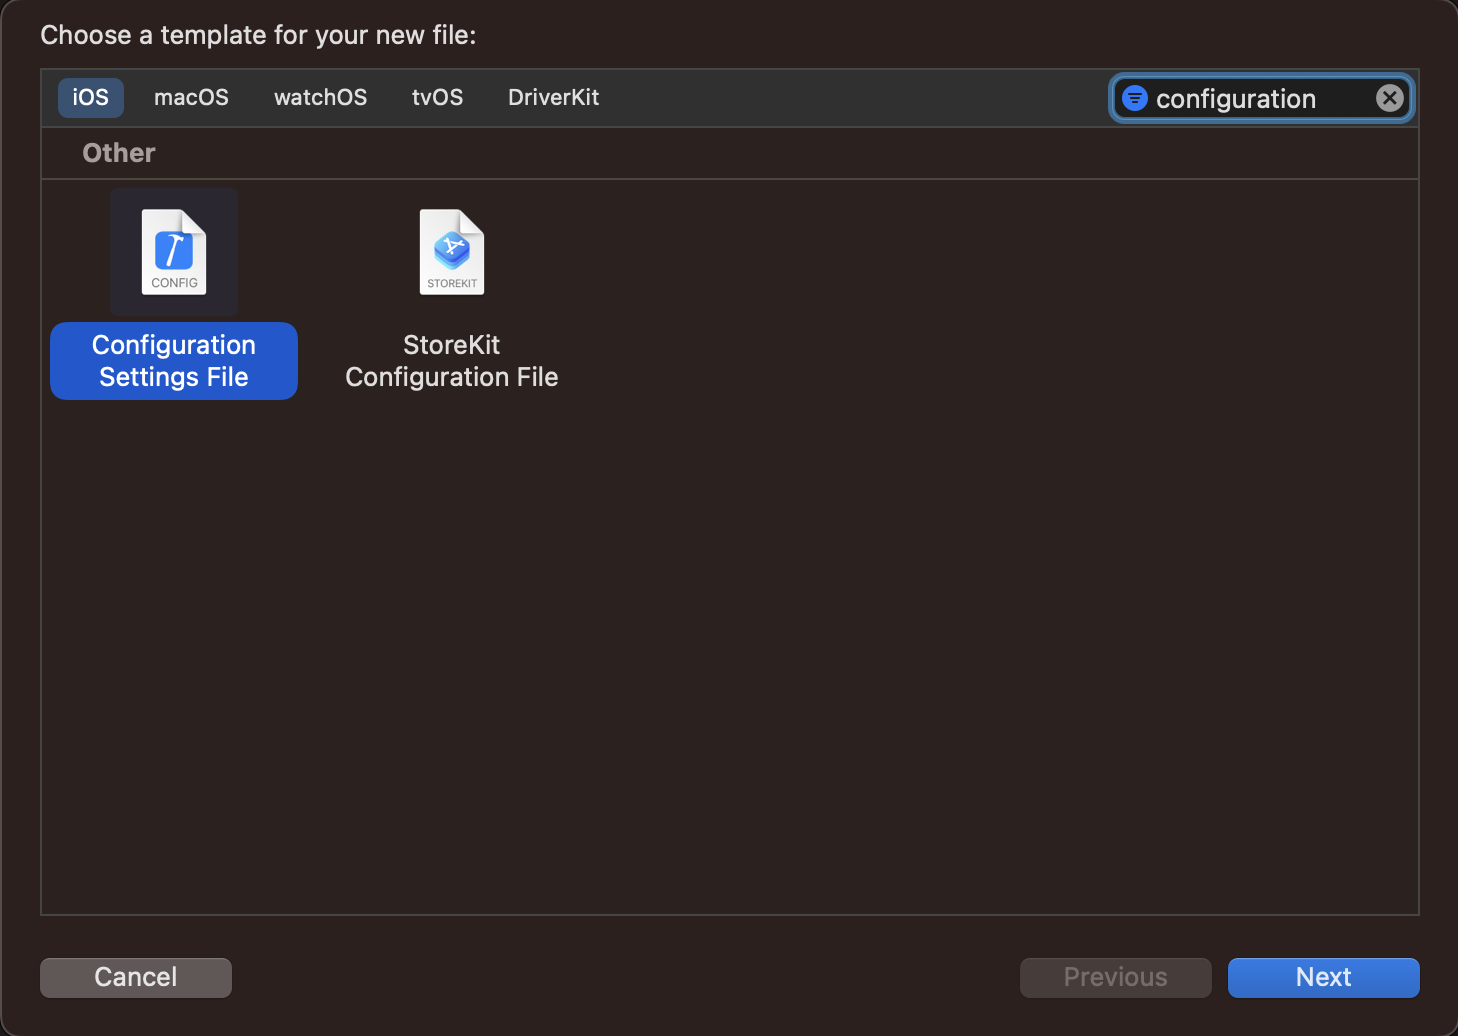
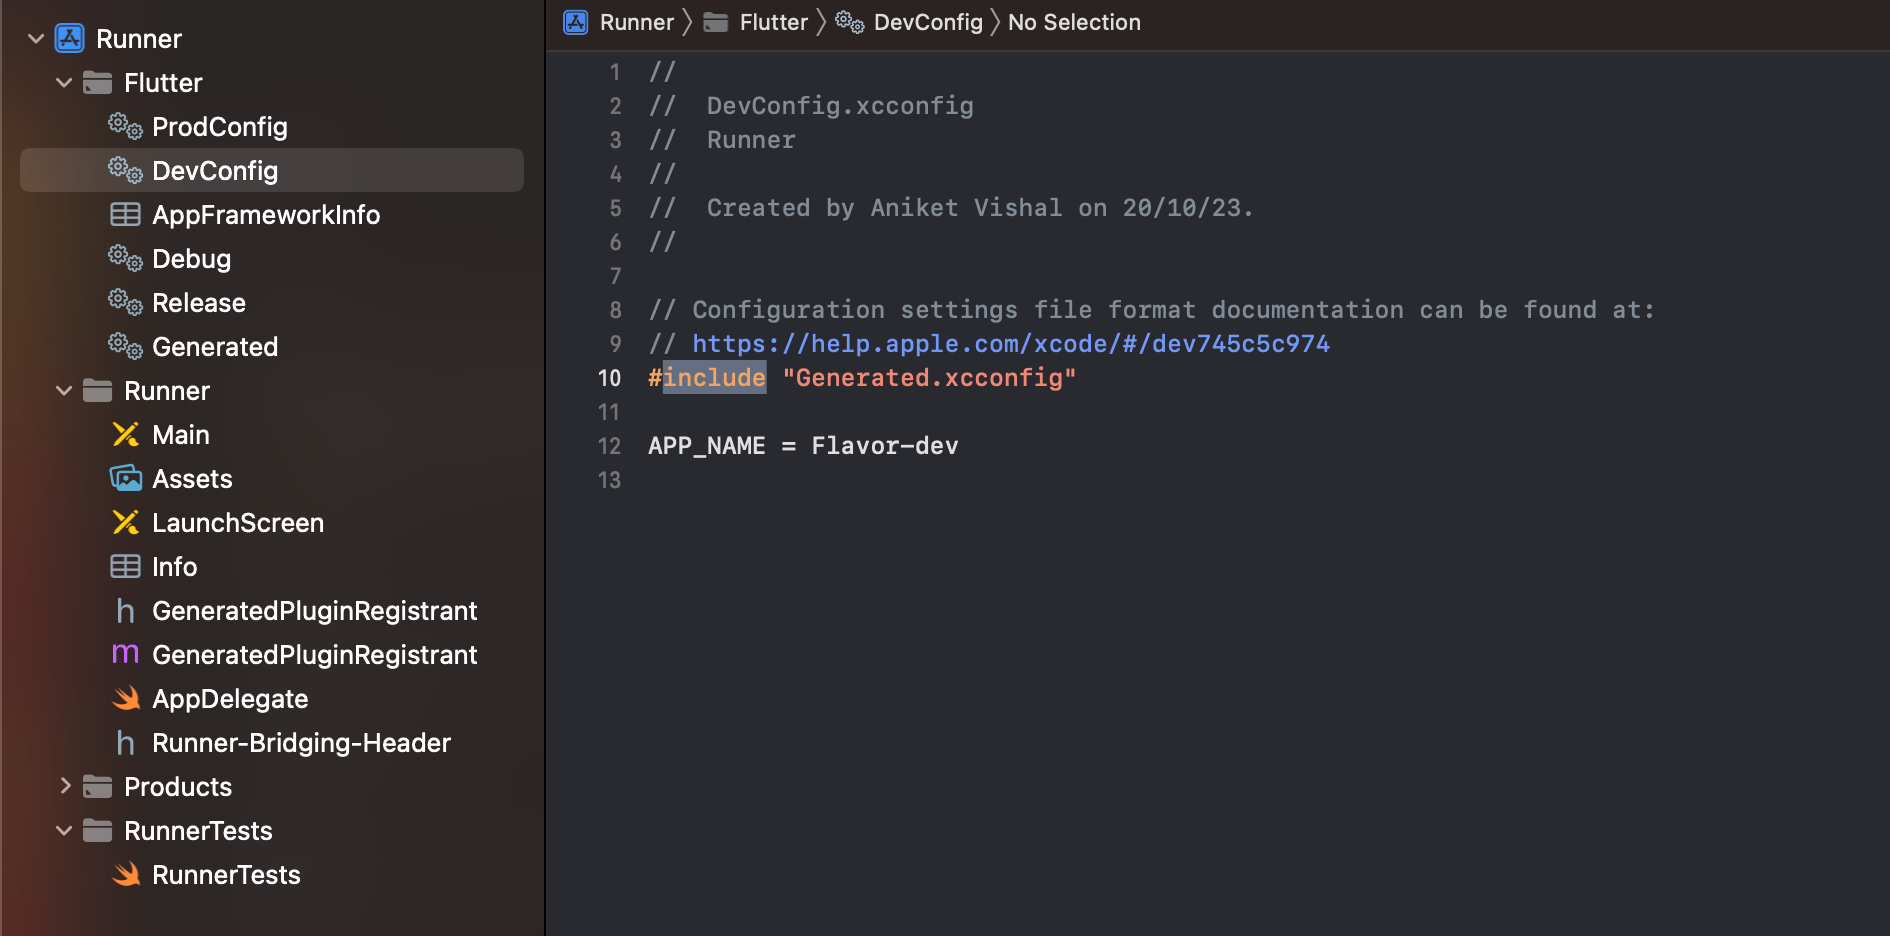
- Give some file name (in this case it's "DevConfig") and click create. Leave other settings as it is.

- Declare your variable after include the Flutter generated file.
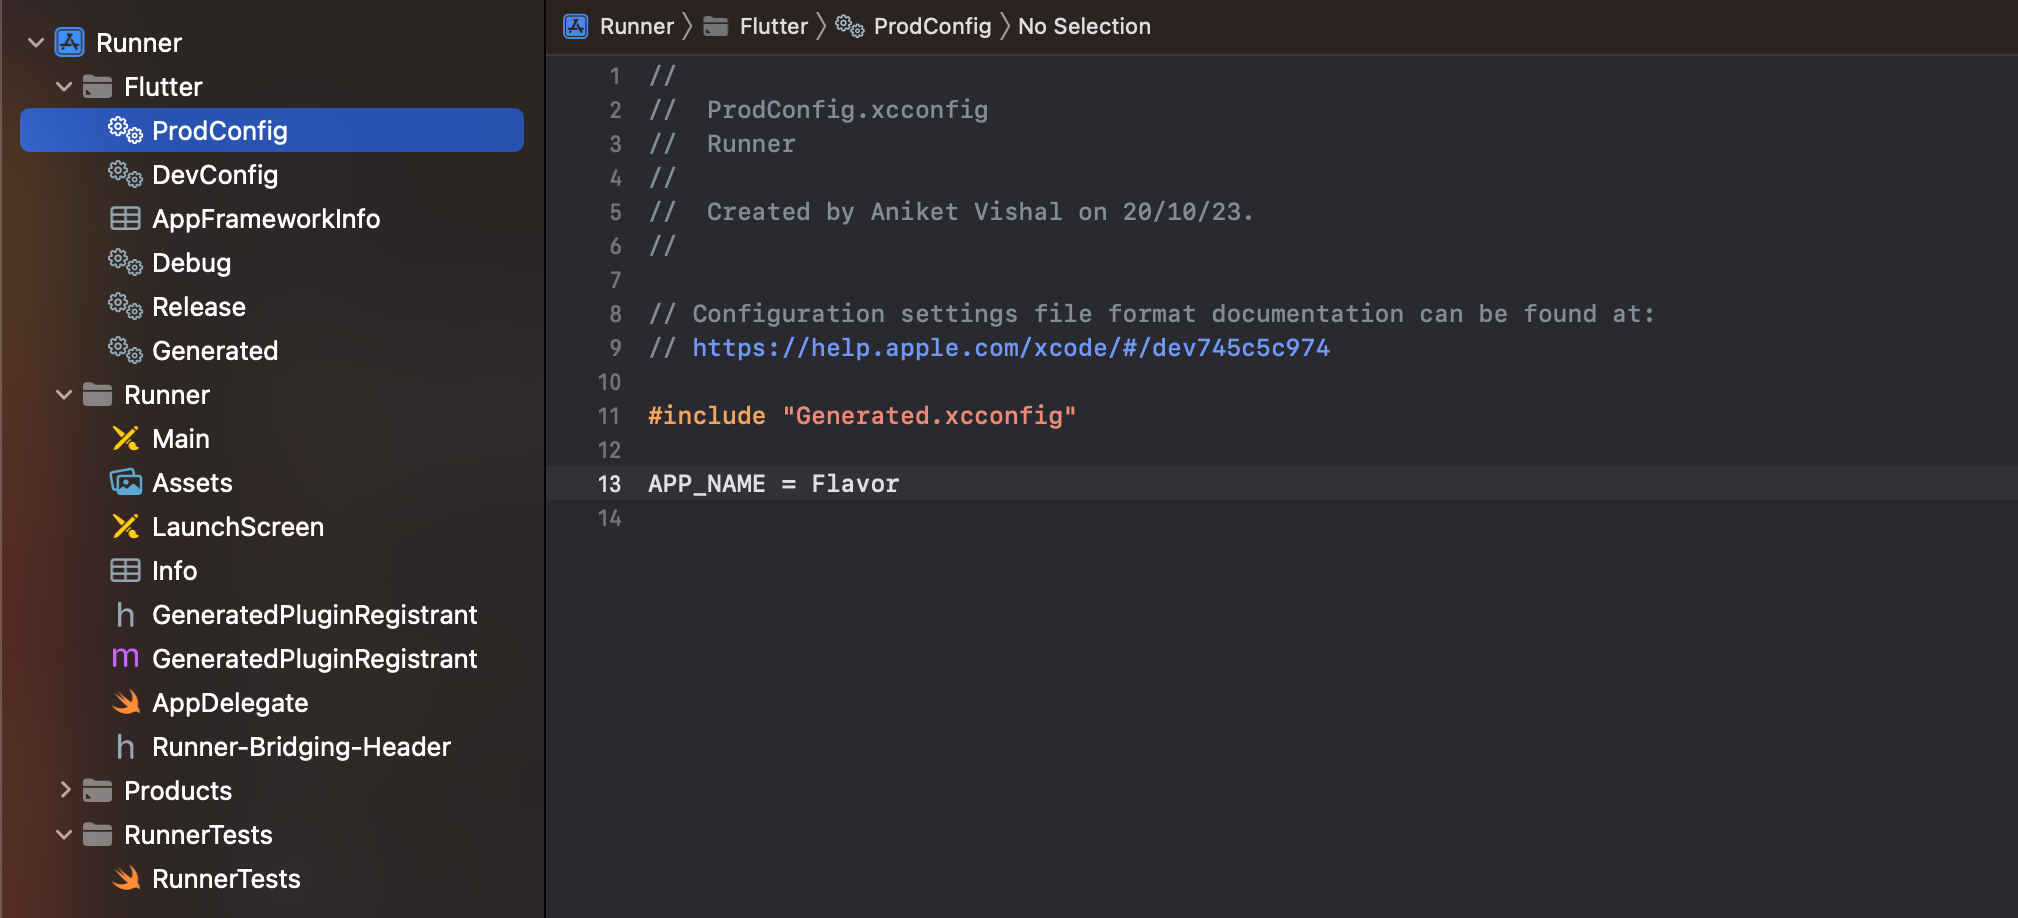
- Create a similar file for the prod scheme and create the same variable in it with different values.
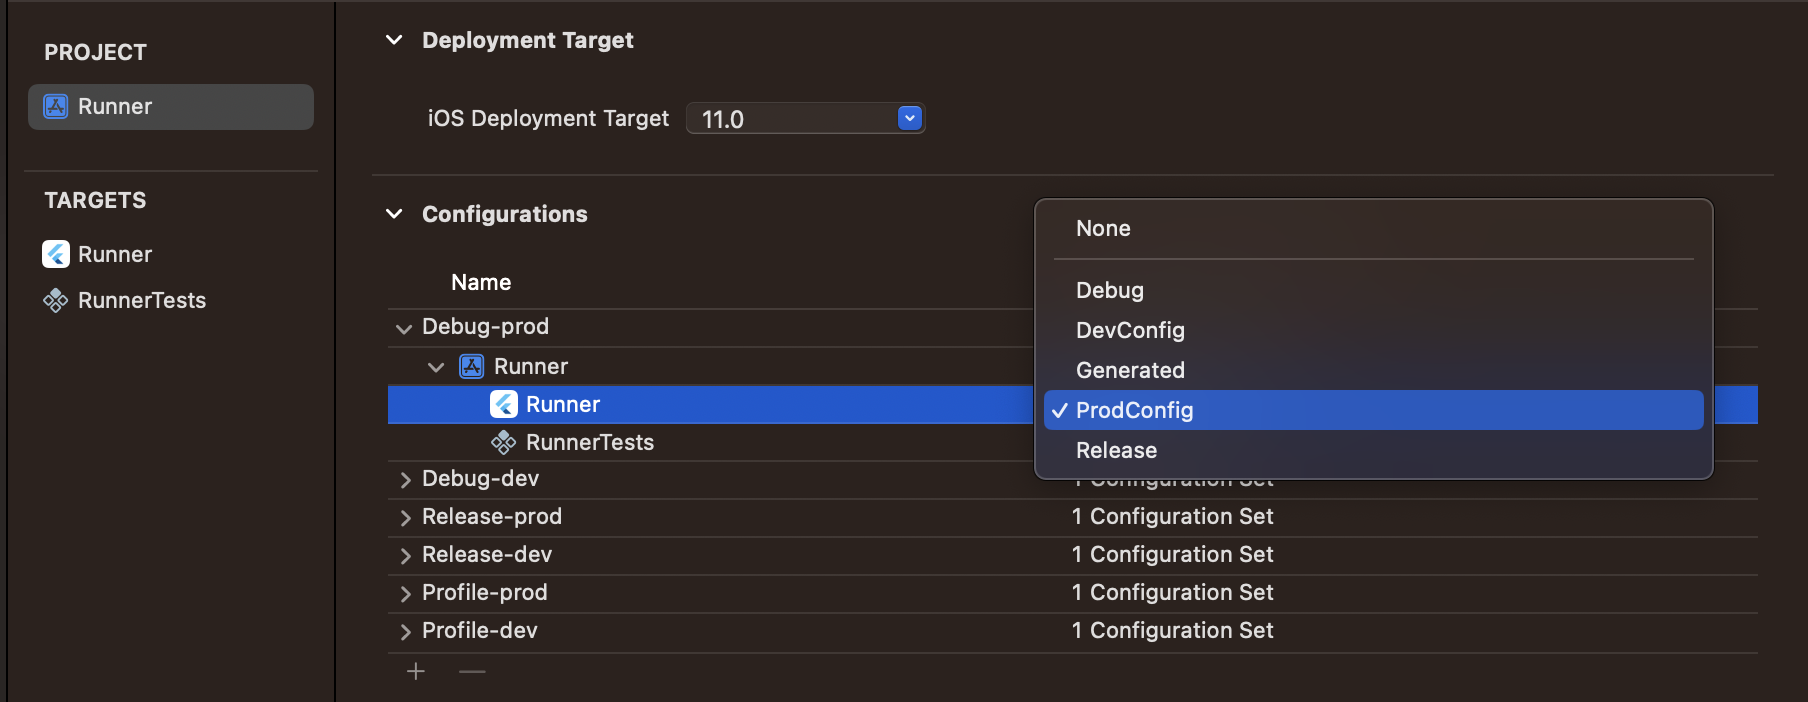
Step 2: Add files in the runner configuration.
- Go to Project runner ➝ Expand different configuration ➝ Select respective config file as target runner value.
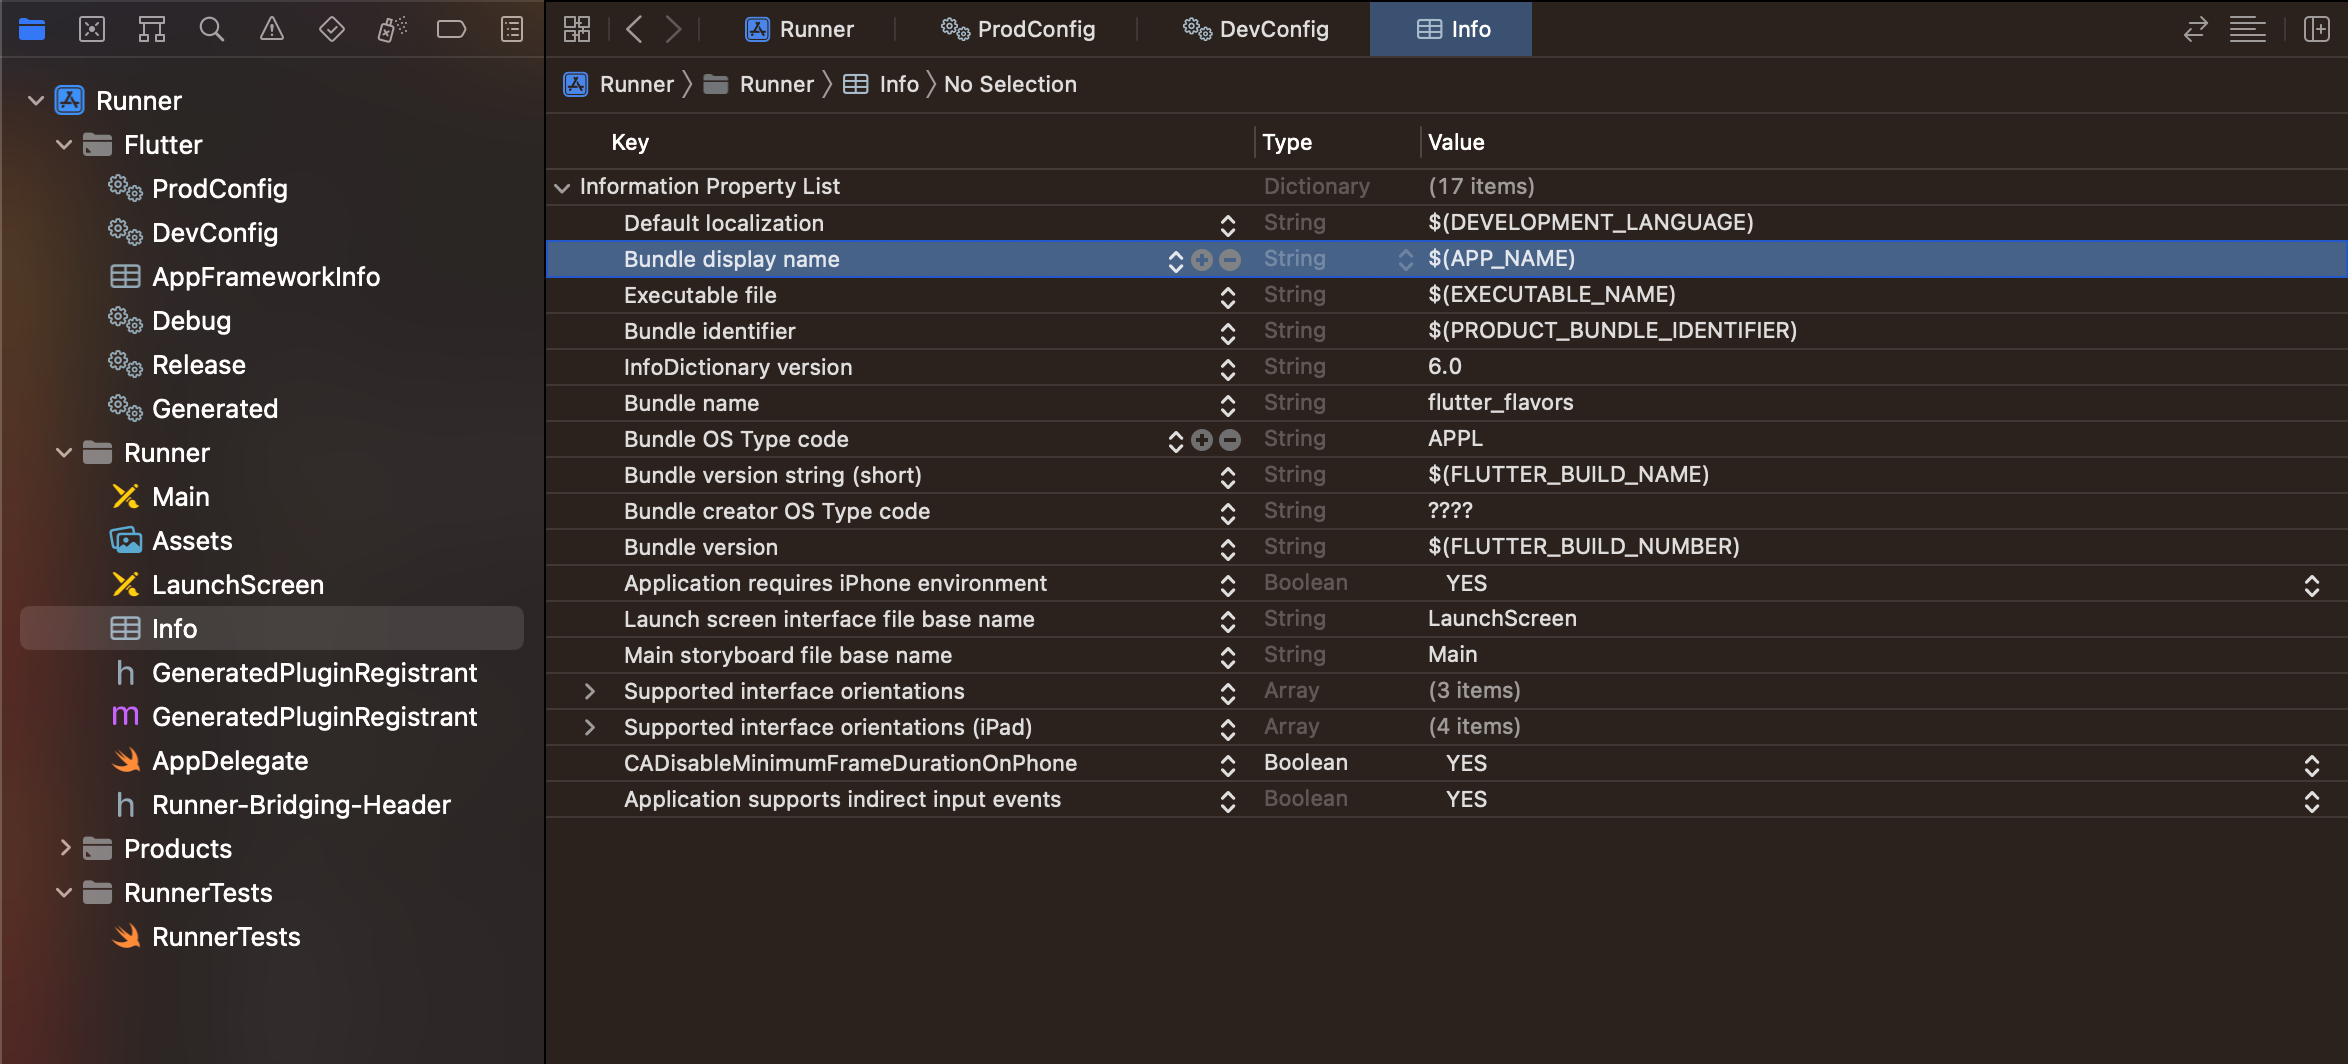
Step 3: Use these variables in plist.info file.
- Now we can directly call these variables in plist.info file and based on the app scheme respective variables will be called from respective config files.
Android:
The Android setup can also be done in 3 steps:
- Create a properties file in the Android directory of our project.
- Declear different variables for dev and prod.
- Use these variables in app level gradel file by importing the properties file.
Step 1: Create a properties file
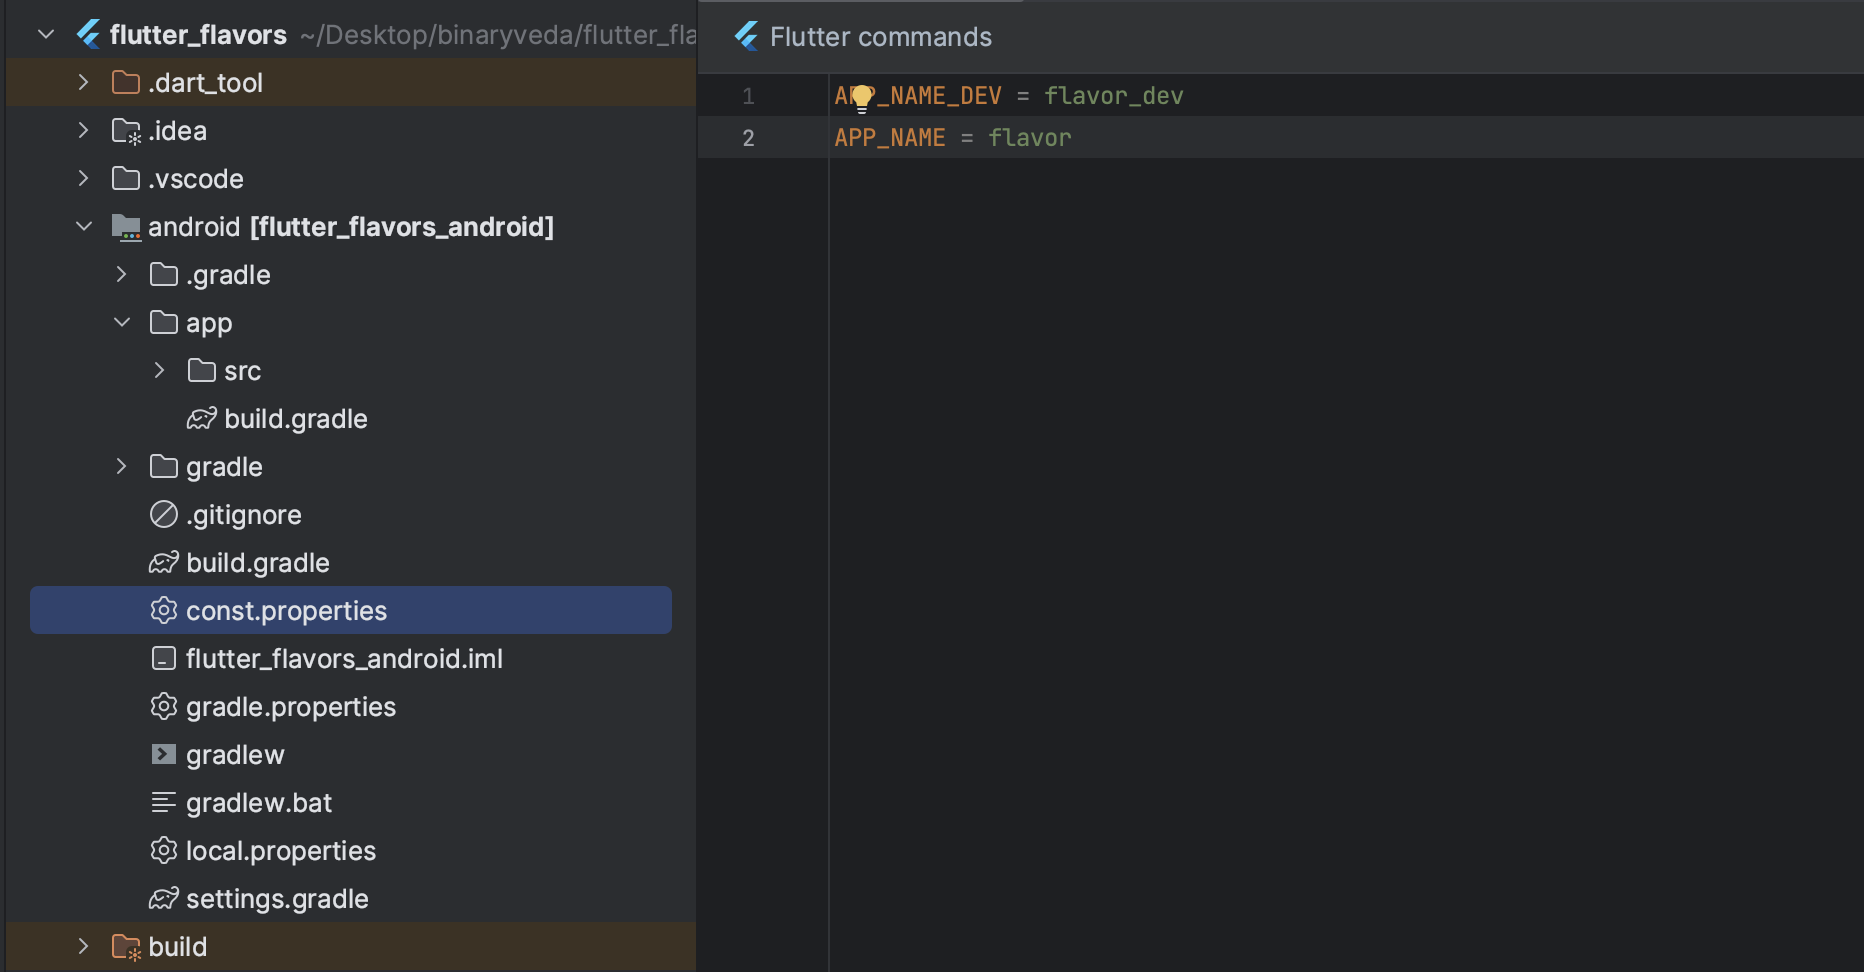
- Create a new file called const.properties inside the Android directory. The name can be different but the extension will be ".properties".
Step 2: Declare the variables.
Step 3: Use these variables
First, import the const.properties file inside app level gradle file
Now use the variables in the flavor section.
4. Security
- To keep the keys secure please add the iOS config file and Android properties file in git ignore. If we do not do so then we might push the files to the remote version control by mistake and this will be dangerous for app security.
- If we were using CI/CD then in that case we should push the config and properties file to the remote version control. In the files, all the variables should be declared but their values should be passed from the variable section of the remote version control. Talked about this in detail in the CI/CD document,
5. Conclusion
Flutter flavors empower developers to create versatile and customized apps for various environments and platforms. With Flutter, building apps for both Android and iOS has never been more accessible. By organizing your code and assets effectively, you can create distinctive app versions for different purposes, all while maintaining the codebase's integrity.
Flutter continues to evolve, and with the addition of features like flavors, it has become an even more attractive choice for cross-platform app development. Whether you're targeting Android, iOS, or both, Flutter's flexibility and power are at your disposal. Happy coding! 🚀📱🍏
Project Source codes: https://gitlab.com/aniket76/flutter-flavor


.webp)